
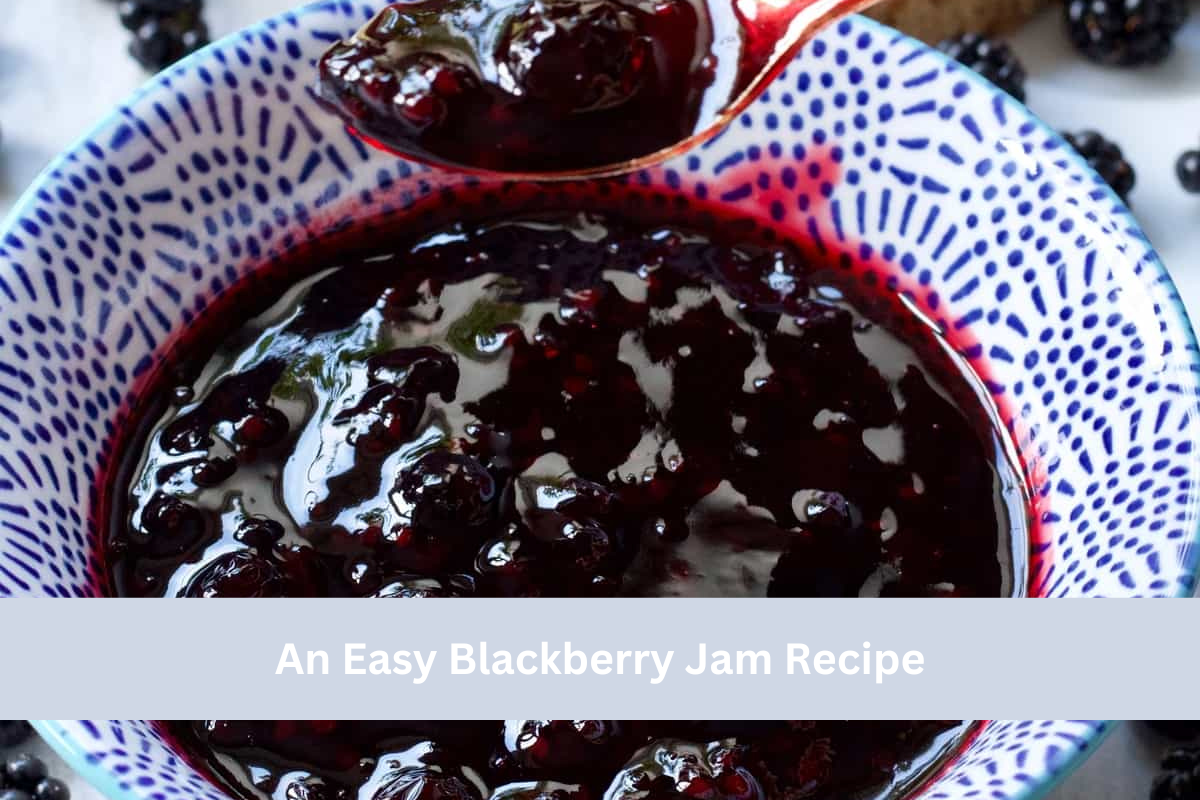
An Easy Blackberry Jam Recipe: An easy recipe for homemade blackberry jam that is perfect for novice jam makers and includes a lot of helpful hints and suggestions! If you want to make rich and delicious blackberry jam every time, this process is nearly flawless.
An Easy Blackberry Jam Recipe

On every occasion that I consume blackberry jam, I am brought back to the balmy summer evenings when I went blackberry picking. You can select your own blackberries at pick-your-own farms, which are located all throughout the United Kingdom. Picking your own blackberries is a stress-free and enjoyable hobby.
On the other hand, returning home with your haul and transforming it into a delectable homemade fresh blackberry jam is an even more satisfying experience.
Your choice of whether to utilize wild blackberries or blackberries purchased from a store is entirely up to you. To put it another way, this recipe is really easy to follow. Additionally, because this is a recipe for a small batch, you can complete the preparation of this jam in less than half an hour, which is a breeze.
Ingredients
- 2.2 pounds blackberries best to use fresh seasonal blackberries
- 12 ounce white sugar
- 2 Tbsp pectin read notes for pectin-free version
- 1 lemon, juiced or bottled juice – 1/4 cup
Instructions
IF YOU WANT MORE SIGNIFICANT BITS OF BLACKBERRY IN THE JAM
-
Spread the sugar and fresh berries out in a bowl and let them sit there for a few hours (or overnight). During this period of time, the berries will macerate, and the sugar will start to dissolve. As a result, the amount of time that must pass before the sugar completely dissolves will be reduced, which will allow the berries to maintain a greater degree of continuity.
IF YOU WANT FEWER SEEDS IN YOUR JAM
-
The first step is to crush the blackberries and then add them to the pan along with the lemon juice. Keep the mixture at a low simmer for a few minutes to break down the fruit, and then strain it through a sieve or a jelly bag and transfer it to a bowl. After that, you can either add two to three spoonfuls of the seeds back into the jam or remove the seeds totally to make the jam more similar to a blackberry jelly recipe (which just uses the liquid from the blackberries).
THE USUAL STEPS
- Beginning with a potato masher or another comparable instrument, begin by very lightly mashing the blackberries that are located in a dish (or the pan).
- After that, put the sugar, blackberries, lemon juice, and pectin into a casserole dish that has a medium-sized heavy base. In order to completely dissolve the sugar, cook the mixture over low to medium heat while stirring it regularly. Later on, there will be no possibility of a jam that is gritty or sugar crystallized as a result of this.
- While the mixture is being heated at a high temperature for five minutes, without disturbing it, bring it to a boil (a rolling boil that cannot be brought down). Make sure the jam is not sticking to the bottom of the pan by using a spoon to stir it around sometimes. If this is the case, you can blend the ingredients a few times and then turn the heat down a little bit.
- You can use either a thermometer or the saucer test to determine whether or not the jam has reached the stage when it will set. To use a thermometer, the temperature must be 105 degrees Celsius (220 degrees Fahrenheit).
- In order to obtain a clean jam, remove any surplus foam that is located on the top of the pan. It is also possible to add a small bit of butter right at the conclusion of the process and swirl it in order to assist in dispersing the remaining foam or scum.
- Proceed to remove the jam from the heat and allow it to cool for ten to fifteen minutes. The berries will be able to settle as a result of this, which will prevent them from sinking to the bottom of the jars.
- In the meantime, place the jars that you will be used for the jam in the oven for ten minutes at a temperature of 160 degrees Celsius (325 degrees Fahrenheit) to ensure that they are thoroughly dry.
- The jam should be transferred to the jars once the jar has been placed on a wooden surface (or another surface that is heat resistant). Although a canning funnel makes this procedure simpler, it is not required to complete it.
- The jars should be sealed after any spillage that may have occurred on the exterior of the jar has been removed with a moist cloth. Should you wish to successfully “can” your jam, it is imperative that you refrain from touching the lip or the interior of the lid.
STORING:
-
If you intend to use the blackberry jam within a reasonable amount of time and do not intend to properly “can” it, then it can be stored in the refrigerator for up to three weeks or in the freezer for up to six months.
- Alternatively, if you want to adequately store your jam for long-term storage, you can use the hot water bath method (for more information, see the comments below). In this manner, your jam will be able to be stored in a cool, dry, and dark environment for up to two years.


Leave a Reply